Too Long? Read This First
- Wati Instagram DM automation lets you automatically send a DM to anyone who comments on your Instagram posts or reels, without any manual effort from your team.
- Before you start, make sure you have an Instagram Business or Creator account, a Facebook Page connected to it, and an active Wati paid plan.
- Connect your Instagram account in Wati via Profile > Channel Status > Instagram, then build your chatbot flow in Automation > Flow Builder.
- Head to Automation > Campaign Rule, set your trigger to "New IG comment received," and link your flow to activate the automation.
- Optionally, add keyword triggers so the DM only fires when a comment contains a specific word like "PROMO" or "PRICE."
- Always test using a secondary Instagram account before going live to make sure the DM fires correctly and lands in your Wati Team Inbox.
You’ve got people commenting on your Instagram posts.
Now let’s ensure every single one of them gets a DM back, automatically, through Wati Instagram DM automation.
From connecting your account to your first live auto-DM, the whole setup takes under 15 minutes.
This guide covers general comment automation, where all comments trigger a DM. If you want the DM to fire only on comments containing a specific keyword, finish this setup first and then follow the keyword trigger guide for that configuration.
Before You Start: What You Need
Before you dive into the Wati Instagram setup, make sure these three things are in place. Missing any one of them will stop the connection from completing.
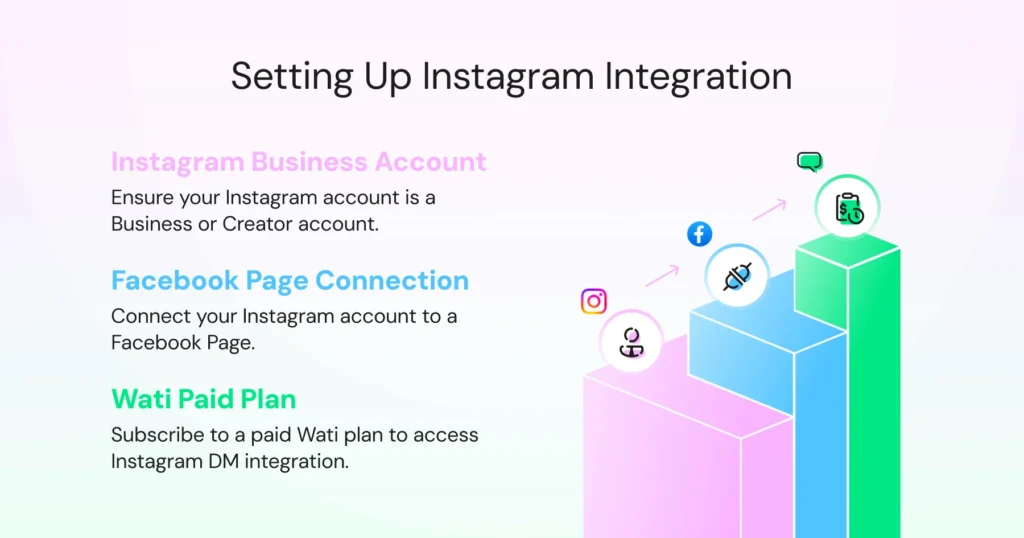
1. An Instagram Business or Creator account
Personal accounts are not supported by the Meta API, so comment automation will not work on them. If your account is currently personal, go to Instagram Settings, then Account, then Switch to Professional Account and select Business or Creator before proceeding.
2. A Facebook Page connected to your Instagram account
This is the most commonly missed step and the one that causes the most frustration mid-setup. The Meta API requires this link to exist before any third-party tool, including Wati, can connect to your Instagram account.
Heads up: If your Instagram is not connected to a Facebook Page, the Wati connection will fail at Step 1. Set this up first via Meta’s official help documentation before continuing.
3. A Wati account on any paid plan
Instagram DM integration is available across Wati’s Growth, Pro, and Business plans.
How to Set Up Instagram Comment Automation in Wati?
You have got your Wati account ready and your Instagram connected. Now it is time to put the automation to work.
The steps below walk you through everything, from building your first chatbot flow to setting the trigger that fires a DM the moment someone comments on your post.
Follow them in order and you will have a live automation in under 15 minutes.
Step 1: Connect Your Instagram Account to Wati
Before any automation can go live, your Instagram account needs to be connected to Wati. If you have already done this, skip to Step 2.
1. Log in to your Wati account and navigate to Profile > Channel Status > Instagram.
2. Click Get Started.
3. Review the prerequisite checklist that appears on screen. Expand each item and confirm it is complete, then select Yes for all steps.
4. Click Connect Instagram. You will be redirected to a Meta login screen.
5. Enter your Facebook Admin credentials
6. Select your Business Portfolio. Choose only one and keep the “Opt in to current businesses only” option checked.
7. Select your Facebook Page. Again, choose only one and keep “Opt in to current pages only” checked.
8. Select the Instagram account you want to connect. Select only one as selecting multiple accounts will cause the connection to fail.
9. Review the permissions Wati requires and click Save.
10. A success message will appear. Click Got It to finalise.
11. Scan the QR code displayed on screen to send a test message and confirm the connection is live in your Team Inbox.
Heads up: If your Instagram account does not appear in the dropdown at step 8, it is almost always because the account is not connected to a Facebook Page or the Facebook account you logged in with does not have Admin access to that Page. Go back to your Facebook Page settings and confirm both before retrying.
Step 2: Build Your Chatbot Flow
The chatbot flow is the message your commenter will receive as a DM. You build this first before linking it to your trigger in the next step.
1. Log in to your Wati dashboard and navigate to Automations.
2. Select Chatbots from the Automations menu.
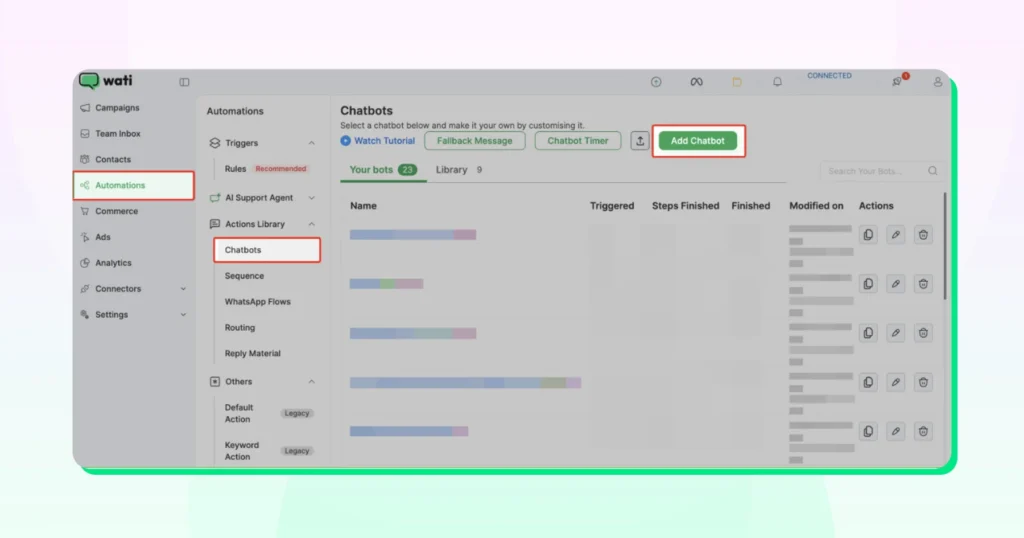
3. Click Add chatbot.
4. Select Instagram as the platform.

5. Use the drag-and-drop editor to build your flow and add nodes from the left panel and connect them to design the conversation.
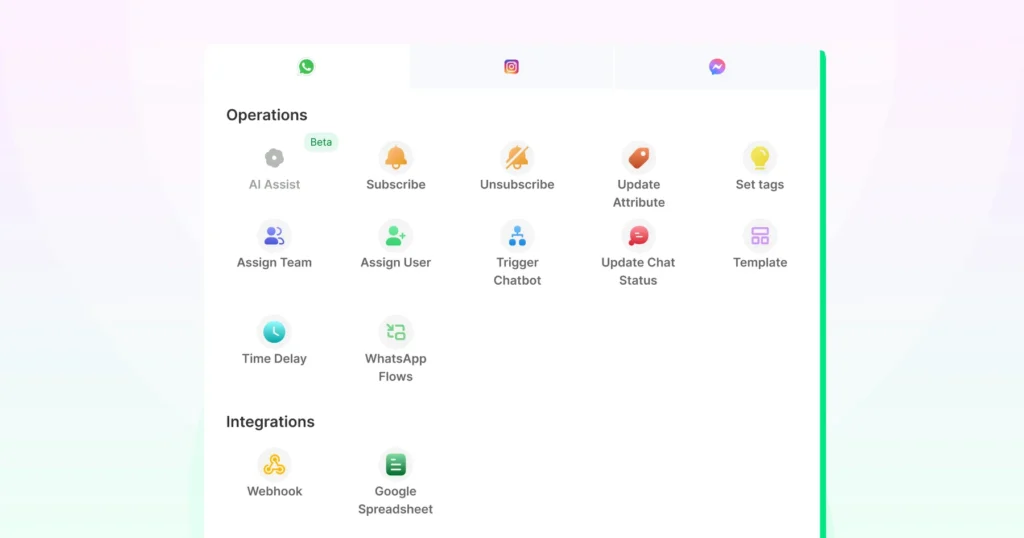
6. Once your flow is ready, click Save.
Step 3: Create the Campaign Rule and Set Your Trigger
With your flow built, you now need to tell Wati what should trigger it. That happens in Campaign Rules, where you connect the “New IG comment received” trigger to the flow you just created.
1. From your Wati dashboard, navigate to Automation > Campaign Rule.
2. Click Create Rule.
3. In the trigger field, select New IG comment received. This tells Wati to fire the automation whenever someone comments on your Instagram post.
4. In the Action field, select Send chatbot on Instagram Direct Message from the dropdown.
5. Select the chatbot flow you built in Step 2.
6. Click Save and toggle the rule ON to activate it.
Note: This rule applies to all comments across your connected Instagram posts and reels. If you want the DM to fire only when a comment contains a specific keyword (like “PRICE” or “PROMO”), complete Step 4 before activating the rule.
Step 4: Add Keyword Triggers (Optional)
This step is optional. If you want the DM to fire on every comment regardless of what it says, skip to Step 5.
If you want the automation to trigger only when a comment contains a specific word, for example, “PROMO” or “PRICE,” complete this step before activating your rule.
1. Inside your Campaign Rule from Step 3, locate the filter field.
2. Set the filter to Incoming message matches your keyword.
3. Enter the keyword you want to monitor. For example, “PROMO”.
4. Choose your matching option:
- Contains: Triggers if the keyword appears anywhere in the comment.
- Exact Match: Triggers only if the comment matches the keyword exactly.
- Fuzzy Match: Triggers even if the keyword has minor variations or typos.
5. Click Save.
Note: You can add multiple keywords within a single rule to trigger the same automated response. For full keyword trigger configuration, including multiple keywords, combining filters, and campaign-specific setup, see the complete keyword trigger guide → [IG-B03 link]
Step 5: Write Your Auto-DM Message
Your auto-DM is the first thing your commenter receives after engaging with your post. A message that feels generic or robotic will get ignored, so it is worth taking a few extra minutes to get this right.
In your chatbot flow in Flow Builder, locate the message node and enter your DM copy.
Here are five things to keep in mind as you write it.
- Reference the post: Let the person know the DM is connected to their comment. Something as simple as “Hey, thanks for commenting on our post!” goes a long way in making the message feel intentional rather than automated.
- Lead with value: The DM should give the commenter something immediately, information, a link, an offer, or an answer to what they were likely asking about when they commented.
- One clear call to action: Ask one question, share one link, or present one next step. Multiple CTAs in a single DM split attention and reduce replies.
- Keep it under 160 characters: Shorter DMs read faster on mobile and consistently get higher reply rates.
- Match your Instagram tone: If your Instagram presence is casual and conversational, the DM should feel the same way. A formal message from a casual brand feels off.
Step 6: Test Before Going Live
Before your automation goes live to real followers, test it to make sure everything fires correctly.
1. Make sure your Campaign Rule from Step 3 is toggled ON.
2. Using a secondary Instagram account, not your business account. Go to one of your published posts and leave a comment.
3. Check the secondary account’s DM inbox within 60 seconds. The auto-DM should arrive from your business account.
4. Review the DM carefully and confirm the message copy is correct, all links work, and any buttons or follow-up nodes in the flow behave as expected.
5. Check your Wati shared team inbox for Instagram and confirm the conversation has appeared there too.
Important: Always test from a secondary account, not your business account. Testing from the same account that owns the automation may suppress the trigger, leading you to believe the automation is not working when it actually is. This is the most common reason users report their comment automation as broken.
Troubleshooting: 5 Common Setup Issues and Fixes
Even with everything set up correctly, things can go wrong. Read on to learn about the five most common issues users run into with Wati Instagram comment automation and exactly how to fix each one.
1. Instagram Account Not Appearing in Wati’s Channel List
This is almost always a Facebook Page issue. Confirm that your Instagram account is a Business or Creator type and that it is connected to a Facebook Page.
Then confirm that the Facebook account you used to log in during Step 1 has Full Admin access to that Page.
To check, go to your Facebook Page and navigate to Settings and Privacy > Page Setup > Page Access.
Your account should be listed with Full Access. If it is not, add it before retrying the connection.
2. Auto-DM Not Firing After a Comment
Check these four things in order:
- Make sure the Campaign Rule is turned ON, not left in draft or paused.
- Check that your post or reel is published and set to public.
- Confirm the rule is correctly linked to the chatbot flow you created in Step 2.
- If you’re using keyword triggers, make sure the test comment matches the keyword exactly as entered.
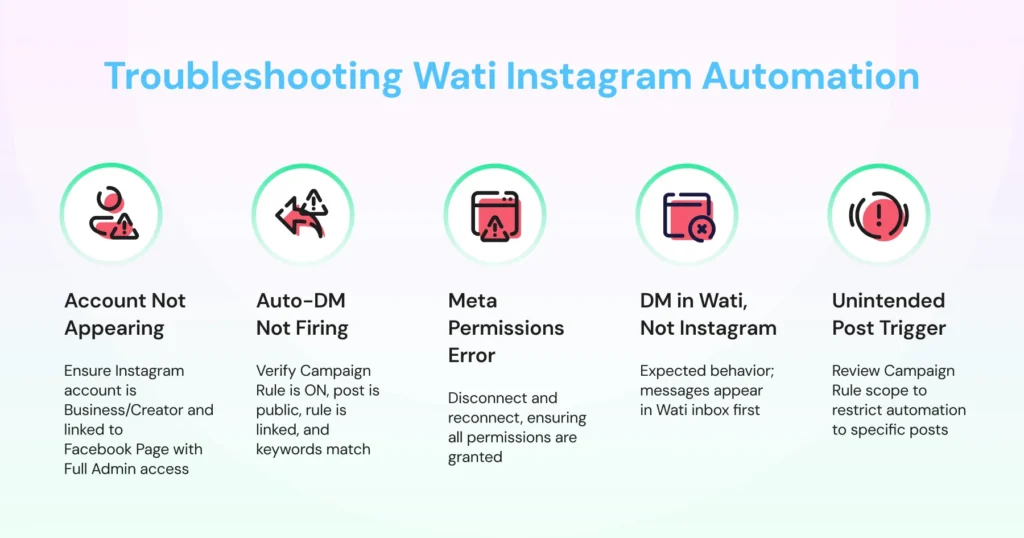
3. Meta Permissions Error During Connection
This means one or more permissions were not granted during the Meta login step.
Return to Profile > Channel Status > Instagram in your Wati dashboard, disconnect the account, and restart the connection flow.
At the permissions screen, make sure every checkbox is ticked before clicking Save. Skipping even one permission will cause the integration to fail.
4. DM Appearing in Wati Team Inbox But Not in the Instagram App
This is expected behaviour and not an error. Wati routes automated DMs through its own inbox. There may be a delay before they appear in the native Instagram app.
If the message is visible in your Wati Team Inbox, the automation is working correctly.
5. Instagram Comment automation Firing on Unintended Posts
If your automation is triggering on posts you did not intend to include, review your Campaign Rule settings.
Check whether the rule is set to apply broadly across all posts rather than a specific one, and adjust the scope accordingly to restrict it to the posts or reels you want covered.
What to Set Up Next
Your Instagram comment automation is live. Here are the three most useful things to add next, depending on what you want to do.
- If you want the DM to fire only when a comment contains a specific keyword for a product drop, a campaign, or a giveaway, see the full keyword-triggered Instagram automation setup guide.
- If you want to build an FAQ bot that automatically handles common questions inside your Instagram DMs (pricing, availability, shipping, business hours), see the Instagram FAQ chatbot guide.
- If you want to set up a Welcome Message for new DM conversations or an Out of Office reply for after-hours messages, both are auto-created as draft rules when you connect Instagram to Wati. Head to Automation > Rules to find them, customise the message, and toggle them on.
Start Turning Comments into Conversations with Wati Instagram DM Automation
Most businesses let comments pile up without acting on them.
This means no follow-up, no DM, and no next step. With Wati Instagram DM automation live on your account, that changes.
Every comment is now an opening for a conversation, a lead, or a sale. From here, you can layer in keyword triggers for specific campaigns, build an FAQ bot for repetitive questions, and connect everything to WhatsApp for follow-up.
Each addition makes the system work harder without adding anything to your team’s workload.
Connect your Instagram to Wati today and do all this easily.
Frequently asked questions
1. How do I set up Instagram comment automation in Wati?
Navigate to Automation > Flow Builder to build your chatbot flow, then go to Automation > Campaign Rule and set your trigger to "New IG comment received." Select "Send chatbot on Instagram Direct Message" as the action, link your flow, and activate the rule. The full setup takes under 15 minutes.
2. What do I need before setting up Instagram comment automation in Wati?
You need three things: an Instagram Business or Creator account, a Facebook Page connected to that Instagram account, and a Wati account on any paid plan (Growth, Pro, or Business). If your Instagram is not connected to a Facebook Page, the Wati connection will fail at Step 1.
3. Why is my Instagram comment automation not working in Wati?
The most common reasons are that the Campaign Rule is not toggled on, the post is set to private, the rule is not correctly linked to your chatbot flow, or the Facebook Page is not properly connected to your Instagram account. Check each of these in order before raising a support ticket.
4. Can I set up keyword-triggered Instagram DMs in Wati?
Yes. Inside your Campaign Rule, set the filter to "Incoming message matches your keyword" and enter the word or phrase you want to trigger the DM.
Related posts
- How to Create WhatsApp Display Name for WhatsApp Account
Learn how to set and optimize your WhatsApp Display Name, a crucial branding element enhancing your business’s credibility and recognition.
- WhatsApp Account Info Report Guide: Request, Download, and Interpret Your Data in 2026
The WhatsApp Account Info Report gives you a clear view of what data is linked to your account. Learn how to request, download, and interpret your report to stay informed about your privacy settings and account details.
- WhatsApp Login Guide 2026: Access Your Account on App, Web, and Desktop
Complete your WhatsApp login in easy steps. Set up your account, personalize your profile, add contacts, and start chatting seamlessly with this guide.
- How to Remove Blue Ticks on WhatsApp (Android, iPhone & Web): 2026 Guide
Learn how to remove WhatsApp blue ticks on Android and iPhone. Take control of your chats, protect privacy, and avoid pressure to reply instantly in 2026.