

-

-
-
Solutions
-
Soluções
-
Soluciones
-
解决方案
-
解決方案
-
الحلول
-
Product
-
Produto
-
Producto
-
产品
-
產品
-
المنتج
-

-
-


 Wati for Marketing
 Wati for Support
 Wati for Sales
 eLearning
 E-commerce
 Marketing Agencies
 Healthcare
 No Code Chatbots
 Click to WhatsApp ads
 Campaigns
 Team Inbox
 Agente de suporte de IA
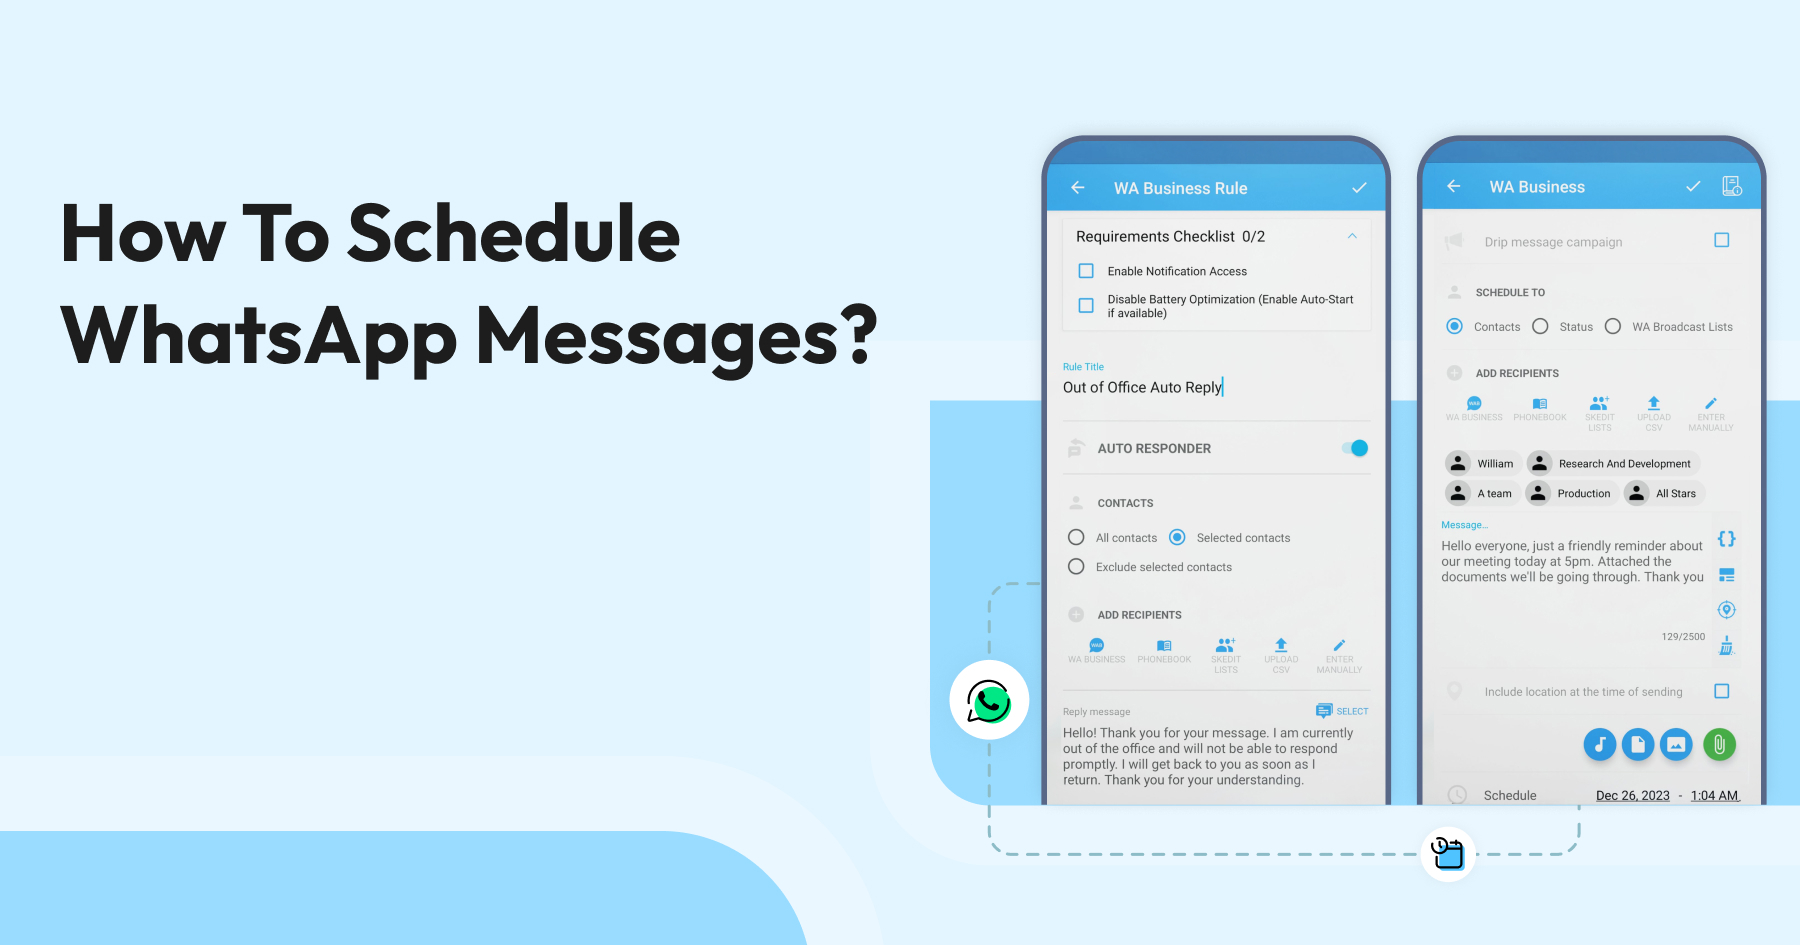
How To Schedule Whatsapp Messages for iPhone and Android in 2026
Written by:
 Shreya
|
Last updated on:
February 21, 2026
|
Fact Checked by :
Shreya
|
Last updated on:
February 21, 2026
|
Fact Checked by :
 Namitha Sudhakar
|
According to: Editorial Policies
Namitha Sudhakar
|
According to: Editorial Policies
Too Long? Read This First
- For Android Users: Apps like SKEDit can automate basic, individual messages for you.
- For iPhone Users: The free, built-in Shortcuts app is a good option for scheduling personal reminders.
- For Small Businesses: The standard WhatsApp Business App is limited to simple auto-replies, such as "Away" or "Greeting" messages.
- For Growing Businesses (The Pro Method): To reliably schedule sales campaigns, automate reminders, and send personalized bulk messages at scale, the Wati Business API is the essential tool.
Imagine your prospect who is highly interested in your product pinging your sales team while they are offline.
Mostly, brands that implement WhatsApp Business API solutions set an autoresponder “Away” message to establish communication. But, even the most interested prospects will turn away if they aren”t prioritised or valued. To stay relevant to them, it’s crucial to schedule WhatsApp messages and cater to their needs in a strategic way before a competitor does it.
Scheduling WhatsApp messages is an effective way to pre-empt communication and set responses for your interested prospects. Automating communication through WhatsApp Business API platforms like Wati provides a distinguished brand experience and improves engagement and sales.
Be it an incomplete checkout, catalog request or simple sales inquiry, scheduling WhatsApp messages closes the gap between the prospect and the brand. Let’s dive in to know more about scheduling WhatsApp messages.
What is WhatsApp Scheduling?
WhatsApp scheduling is a powerful feature that lets you schedule WhatsApp messages to be sent at a specific time, ensuring your messages on WhatsApp reach the right people at the perfect moment.
Whether you’re a business owner wanting to send appointment reminders, a marketer planning promotional messages, or simply someone who likes to send greeting messages on special occasions, scheduling WhatsApp messages can make your life easier.
This functionality is available across various platforms, including WhatsApp Web and through third-party apps like Blueticks. With these tools, you can plan ahead and automate your communication, so you never miss an important date or opportunity to connect.
From sending a birthday wish at midnight to launching a campaign at peak hours, WhatsApp scheduling puts you in control of your messaging strategy.
What are the Different Types of WhatsApp Scheduling?
Understanding the right method to reach your audience depends on your end goal. Generally, WhatsApp scheduling falls into three main categories, each serving a different purpose.
| Type | Who is it for? | Methods | Key Features | Key Limitations |
| Manual and basic scheduling | Individuals, students, freelancers | Android apps (e.g, SKEDit), iPhone shortcuts, Web extensions (e.g, Blueticks) | Schedule single messages, set personal reminders and basic repeaters | Requires phone to be on and connected, no bulk sending or campaigns, high manual effort. |
| Limited automation for small businesses | Local shops, local business providers | WhatsApp Business App, third-party solutions | Automated “greeting” messages, automated “away” messages | Cannot schedule proactive messages, no bulk marketing campaigns, limited to single user |
| Full sales and marketing automation for growing enterprises | Sales teams, Marketing departments, and customer support | Third-party tools, WhatsApp Business API tools like Wati | Schedule personalized broadcasts, automated campaigns, cloud-based servicing | Must use meta-approved templates, |
How Does WhatsApp Scheduling Work?
WhatsApp does not offer a built-in feature to schedule messages. To automate messages or schedule WhatsApp messages, you must use third-party apps or integrate with the WhatsApp Business API, as the native app lacks this functionality.
Advanced solutions use a WhatsApp automation agent, often powered by an intelligent AI agent or AI support agent, to automate messages, answer customer inquiries, and ai handle routine inquiries automatically within the preferred messaging platform. By letting AI handle routine inquiries, human agents are freed up to focus on more complex or high-value customer interactions.
These AI-powered business tools can boost productivity (ai support agent boost) by allowing AI to handle routine inquiries, automate replies, and manage customer inquiries efficiently. WhatsApp can also serve as a complete CRM for remote teams, enabling remote teams to collaboratively manage customer information, streamline communication workflows, and ensure seamless collaboration across locations.

What are the Top WhatsApp Scheduling Features?
The features available for scheduling WhatsApp messages can vary depending on the platform or app you choose. Many tools now allow you to schedule multiple messages at once, set up recurring messages for regular updates, and even send bulk messages to large groups or customer lists.
This is especially useful for businesses looking to automate appointment reminders, send out promotional offers, or keep customers informed with timely updates.
You can also attach images, documents, or other files to your scheduled messages, making it easy to share important information. Contact management features, such as organizing and labeling contacts, help you target your messages more effectively and streamline your communication efforts.
Now, let’s understand how to schedule WhatsApp messages on each WhatsApp platform.
How to Schedule WhatsApp Messages on Android?
For Android users, who make up over 70% of the global smartphone market, the simplest path to scheduling messages is through a trusted third-party app.
One such tool is SKEDit, which is a powerful and user-friendly WhatsApp scheduler for personal messages. WhatsApp doesn’t natively support scheduling for personal accounts, but these third party apps help you schedule messages.
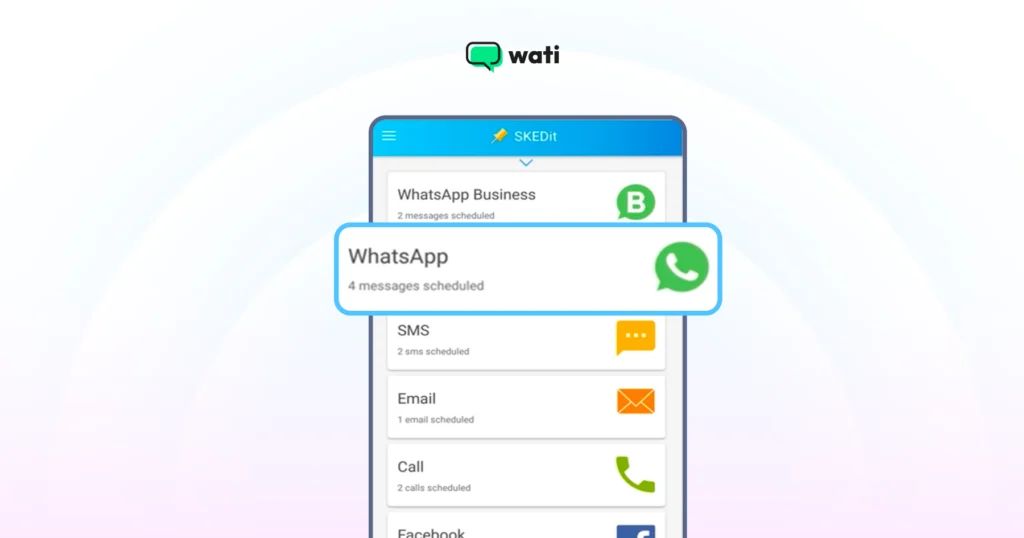
1. Download and set up: Head over to the Google Play Store, search for “SKEDit,” and install it. You’ll need to create an account to get started.

2. Choose Your Service: On the main menu, tap the + icon and select “WhatsApp.” This is where the magic begins.
3. Grant accessibility and select date and time: Once you select “WhatsApp from the main menu”, the app will prompt you to enable access. Open the app and pick a WhatsApp contact or group. Then select time and date.
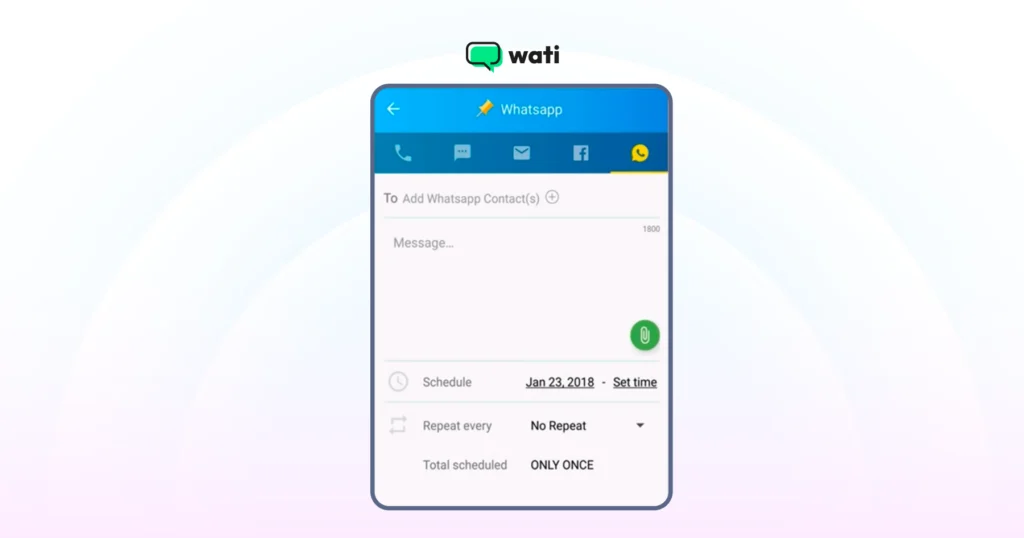
4. Schedule Your Message: Tap “Add WhatsApp Recipient” and choose the contact or group from your list. Type out the message you want to send. You can even attach images, videos, or documents. Set your desired date and time. You can also choose to repeat the message at regular intervals (perfect for weekly team check-ins!).
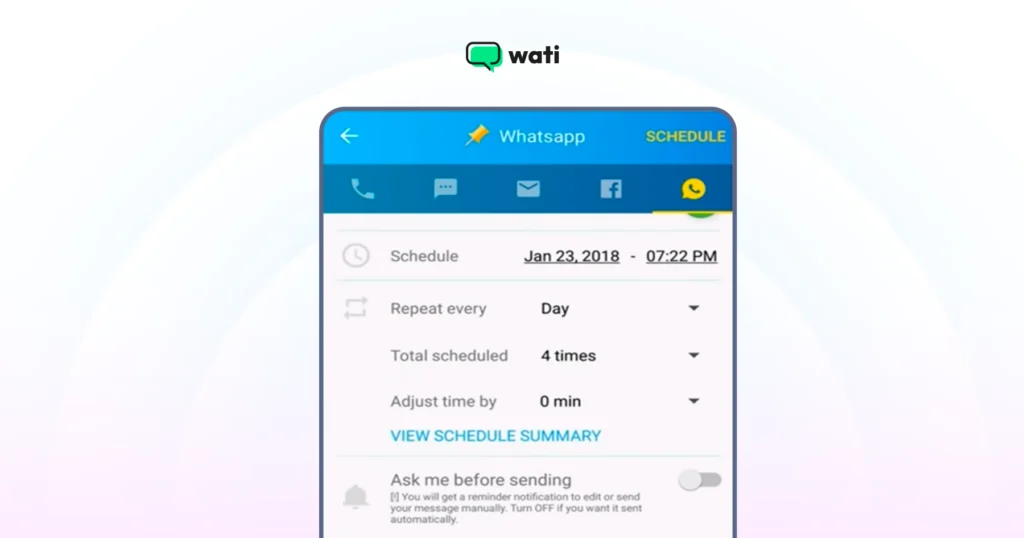
5. Finalize and Relax: Before you save, you’ll see a toggle for “Ask me before sending.” If you turn this off, the message will be sent automatically without any user interaction. If you leave it on, you’ll get a notification at the scheduled time to approve the message before it sends.
Note: With SKEDit, you cannot schedule multiple messages simultaneously. Also, before you save, you’ll see a toggle for “Ask me before sending.” If you turn this off, the message will be sent automatically without any user interaction.
Also, check out the right consumer engagement techniques through WhatsApp Broadcast vs WhatsApp Group and personalize your sales outreach effectively to scale revenue.

How To Schedule WhatsApp Messages on iPhone (The Built-in Method)
iPhone users do not have to rely on an API or third-party tool to schedule responses via WhatsApp for their customers. With the “Shortcut” app, you can automate a fair share of WhatsApp messages and send them at the right time to your prospects.
However, as Apple claims to care a lot about user privacy, scheduling WhatsApp messages on iPhone and iOS devices is more challenging than on Android. Here is how:
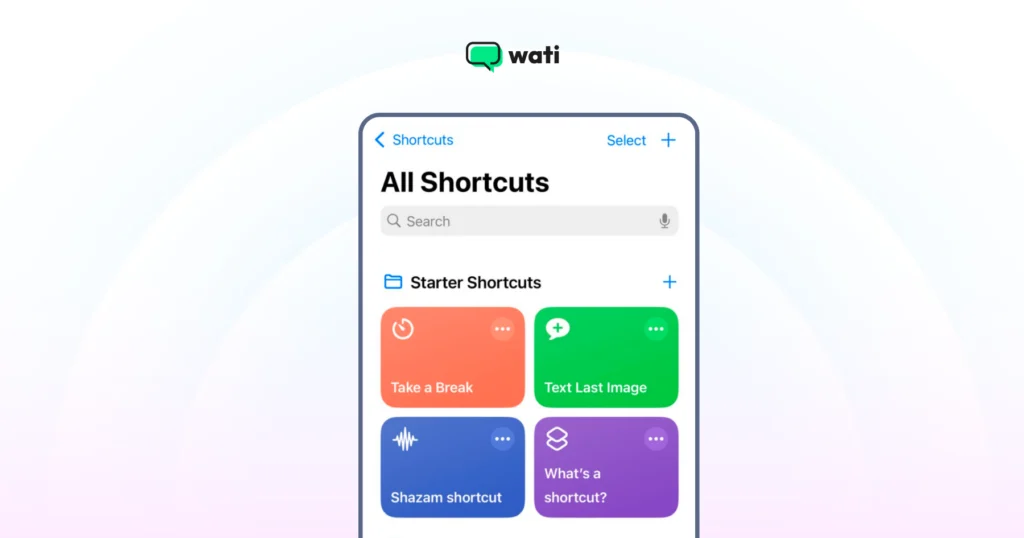
1. Open the Shortcuts app: It’s pre-installed on most iPhones. If you can’t find it, a quick search in the App Store will bring it to the top.
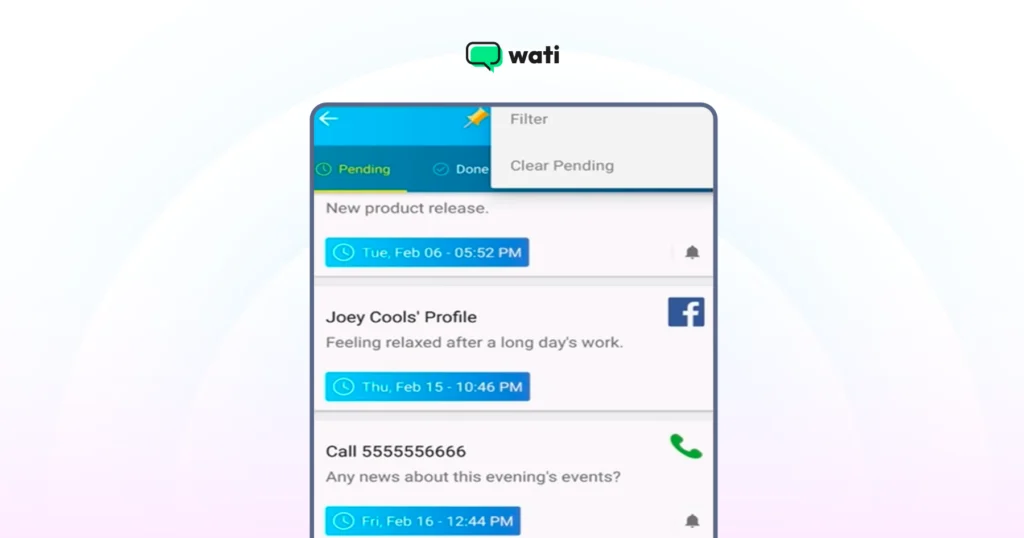
2. Create a Personal Automation: Tap the “Automation” tab at the bottom, then the + icon in the top right. Select “Create Personal Automation.”
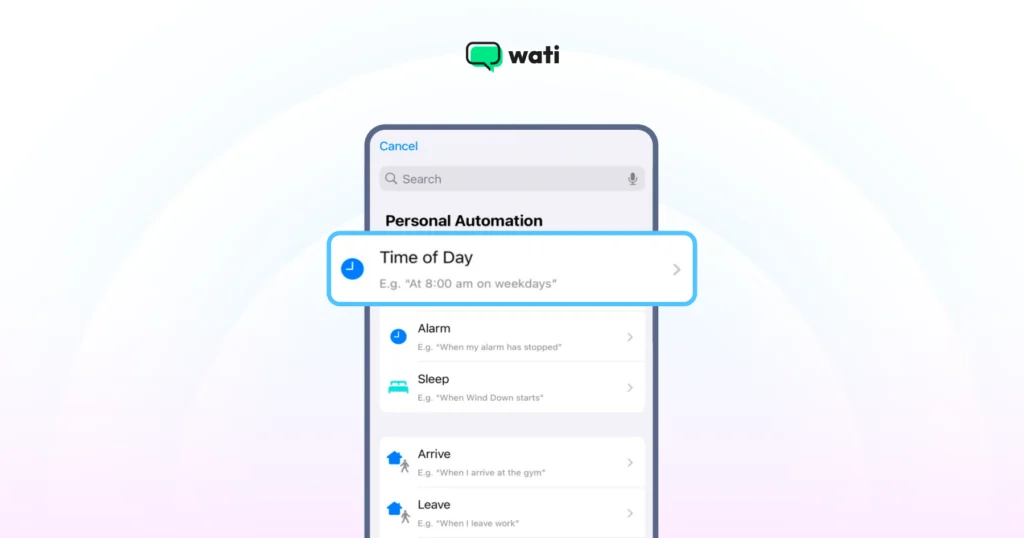
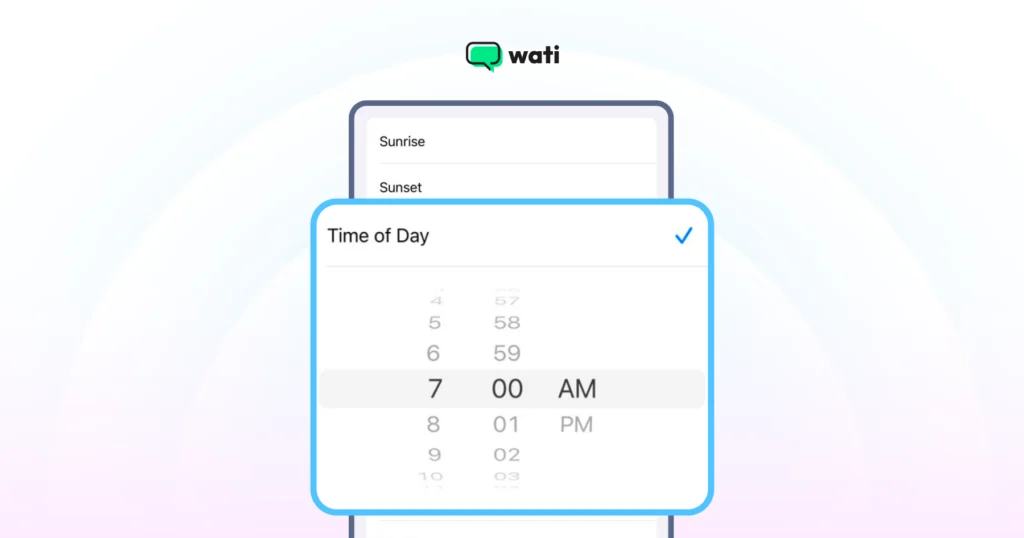
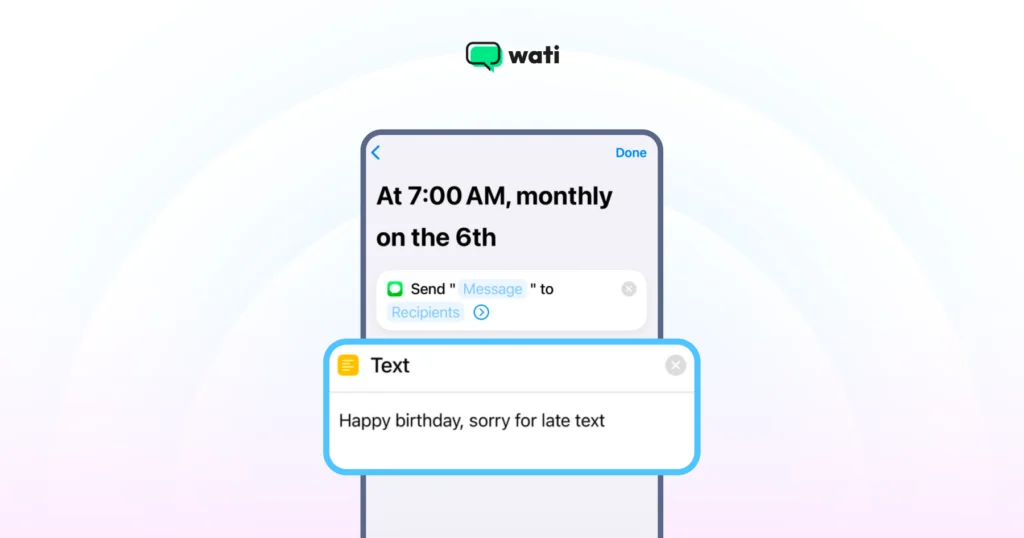
3. Set Your Trigger: Choose “Time of Day” as your trigger. Set the exact time and date you want your message to go out. Under “Repeat,” you can choose Daily, Weekly, or Monthly.
4. Add Your Message Action: Tap “Next,” then “Add Action.” In the search bar, type “Text” and select the “Text” option from the results. In the text box that appears, type the exact message you want to schedule.
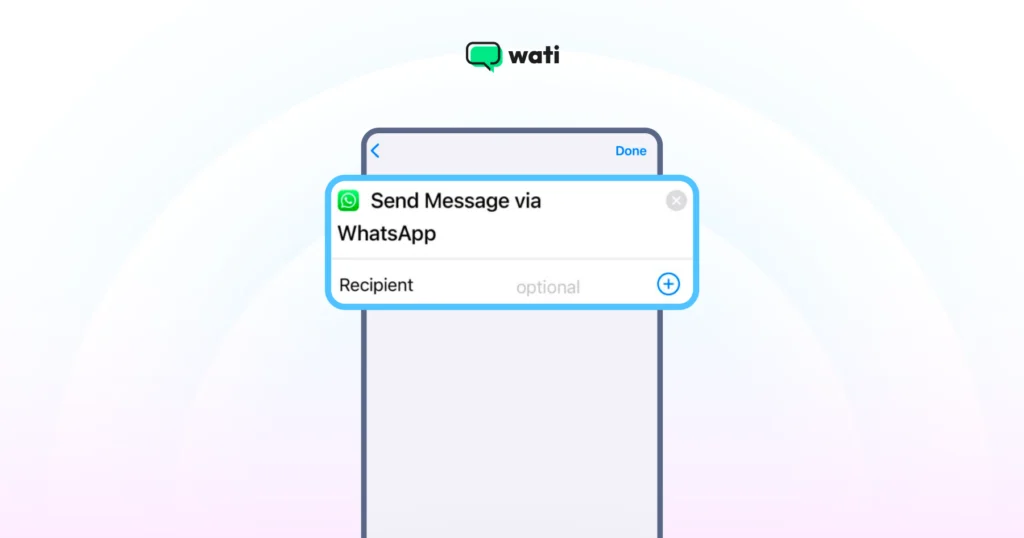
5. Add the WhatsApp Action: Now, tap the blue “+” button below the text box and search for “WhatsApp.” Select “Send Message via WhatsApp” from the list of actions.
6. Choose Your Recipient: After typing the message, tap the ”+” icon—type “WhatsApp” in the search bar on the pop-up. Tap on the faint “Recipient” placeholder and select the contact you want to message.
7. Finalize the Automation: Tap “Next.” Here, you’ll see a crucial toggle: “Ask Before Running.” Make sure to turn this OFF. This ensures the automation runs automatically without needing your approval. Tap “Done,” and your scheduled message is ready to go!
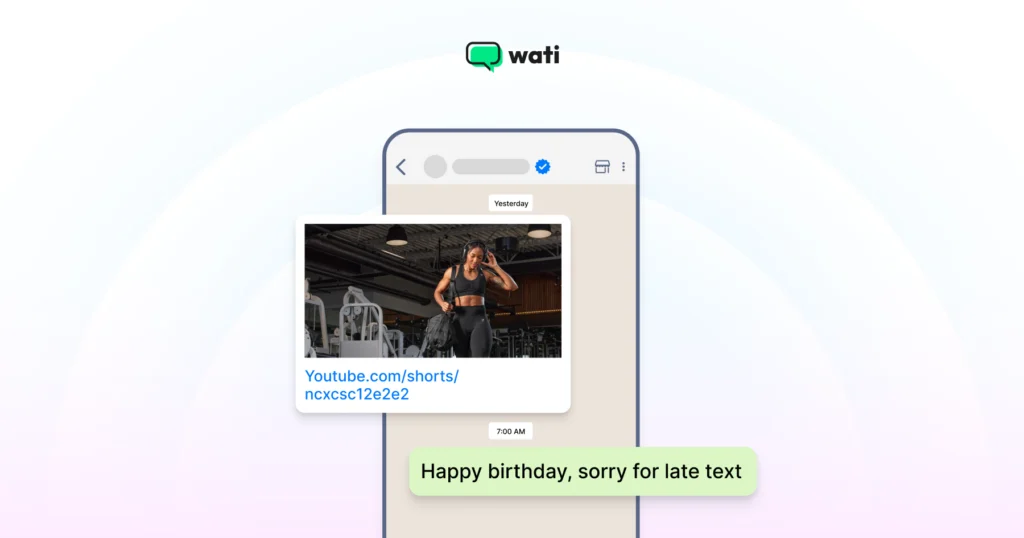
8. Sit back after setting automation: Once you click the notification, it will open your WhatsApp account with the message ready to be sent to the recipient. All you have to do is click send.
With most of us using WhatsApp on our mobile devices, you might wonder if there’s a way to schedule messages through WhatsApp Web. Well, SURPRISE!! There’s a way to do that.
How To Schedule WhatsApp Messages on WhatsApp Web?
With WhatsApp Web generating 2.5 billion unique visits each month and remaining one of the top direct sources of traffic, it has significant sales potential for B2B enterprises.
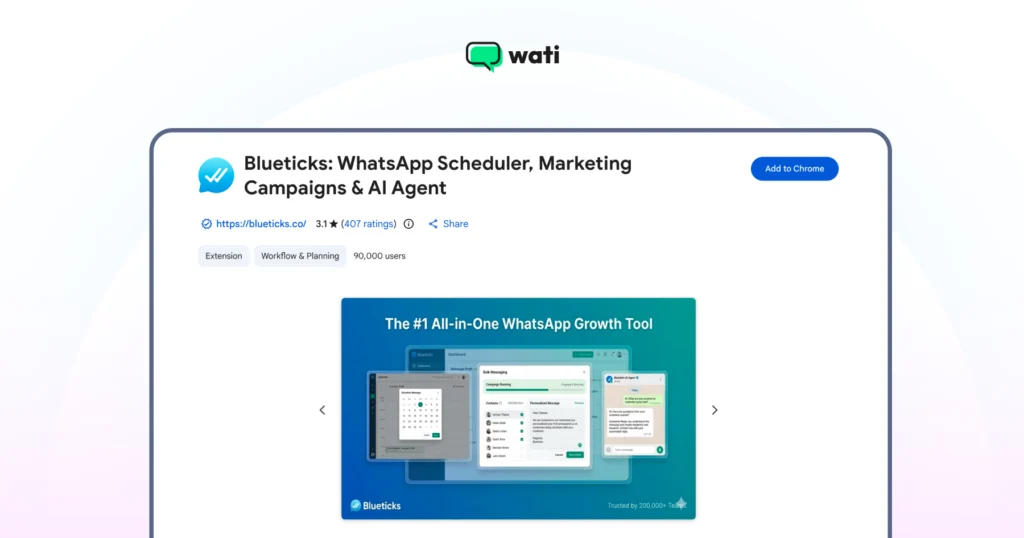
If you attribute WhatsApp engagement to a browser, scheduling messages directly from your browser can be incredibly efficient. The best way to do this is with a Chrome extension, such as Blueticks.
1. Install the Extension: Head to the Chrome Web Store, install the Blueticks extension and verify if the released version supports WhatsApp web updates.
2. Log in to WhatsApp Web: Open WhatsApp Web on your browser and link your account as you normally would.
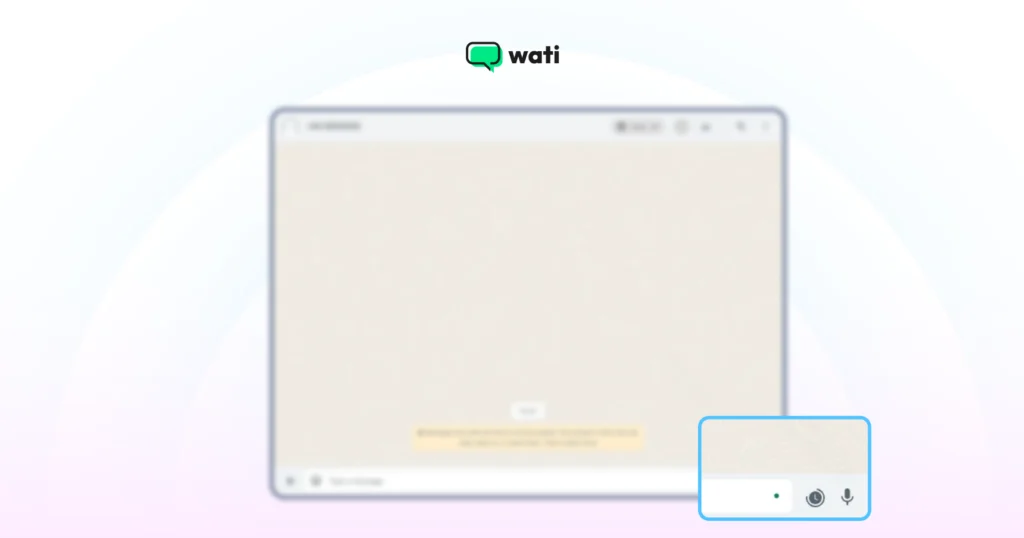
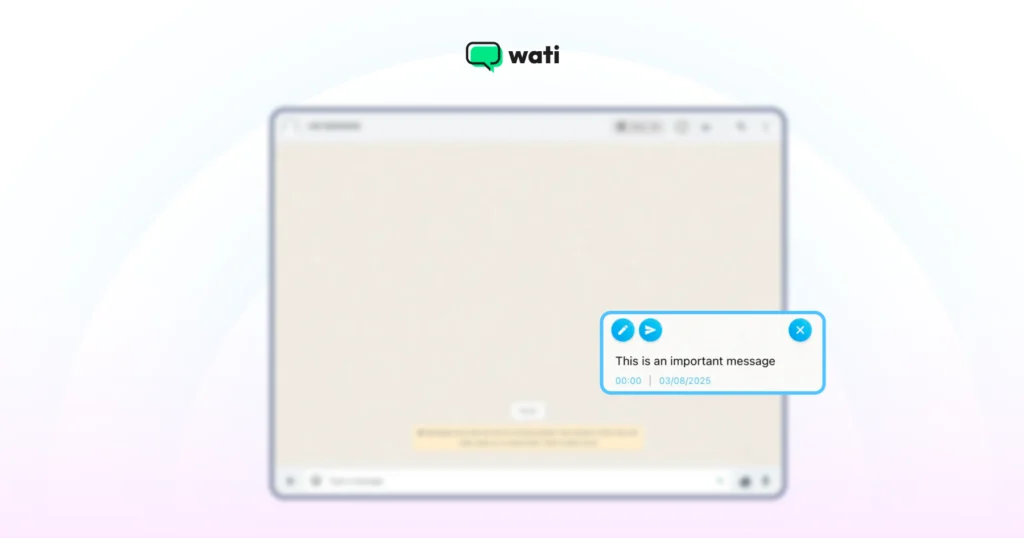
3. Open a Chat: Navigate to the individual or group chat you want to schedule a message for. Write your message, select the exact date and time, and click “Schedule Send.” Your message is now queued up and will be sent automatically, as long as your computer is on and connected to the internet.

4. Now, you see the message you want to send is scheduled and ready.
Now that we’ve explored options for scheduling messages using WhatsApp. Ready to move on to WhatsApp Business?
Why Schedule WhatsApp Messages With WhatsApp Business API?
In 2026, conversational commerce is no longer a buzzword; it’s a reality. While WhatsApp scheduling is effective and convenient, the real power lies in end-to-end sales automation. The standard WhatsApp Business App allows you to set basic “Away” and “Greeting” messages, but it can’t schedule specific campaigns or reminders.
This is where the WhatsApp Business API comes in.
WhatsApp Business API provides a standard, secure gateway to manage campaign infrastructures and regulate brand responses from your WhatsApp Business accounts. It keeps a steady bridge between customers and the brand, and emphasizes quick service at the right time to personalize customer experience. Powerful discipline builds greater loyalty and results in steadier conversions.
With a WhatsApp Business API like Wati, you can build powerful, scalable messaging solutions, and scheduling is one of its most critical features. Wati enables you to build powerful customer experiences that make people feel more connected, and improve your brand positioning in the market.
Top Customer Use Cases of Scheduling WhatsApp Messages With Wati
With a platform like Wati, which is built on the API, you can:
- Schedule Bulk campaigns: Send promotional offers, updates, or newsletters to thousands of customers at once, scheduled for the optimal time. With WhatsApp messages having an average open rate of 98%, this is far more effective than email. Scheduled messages can be used for reminders, promotional offers, and follow-up messages.
- Automate Reminders: Schedule appointment reminders, payment due dates, or abandoned cart notifications to reduce no-shows and increase conversions. You can also send payment reminders to clients or suppliers to ensure timely payments and improve cash flow management.
- Run WhatsApp Flows: Create a series of visual WhatsApp flows to nurture new leads or onboard new customers over several days or weeks.
- Ensure Delivery: Unlike the methods above that require your phone to be on and connected, messages sent via the API are sent from the cloud, guaranteeing delivery at the scheduled time.
Want to learn more? Check out our guide on Leveraging WhatsApp for Conversational Commerce.
How To Schedule WhatsApp Messages on Wati?
To send bulk WhatsApp messages using Wati, follow these simple steps:
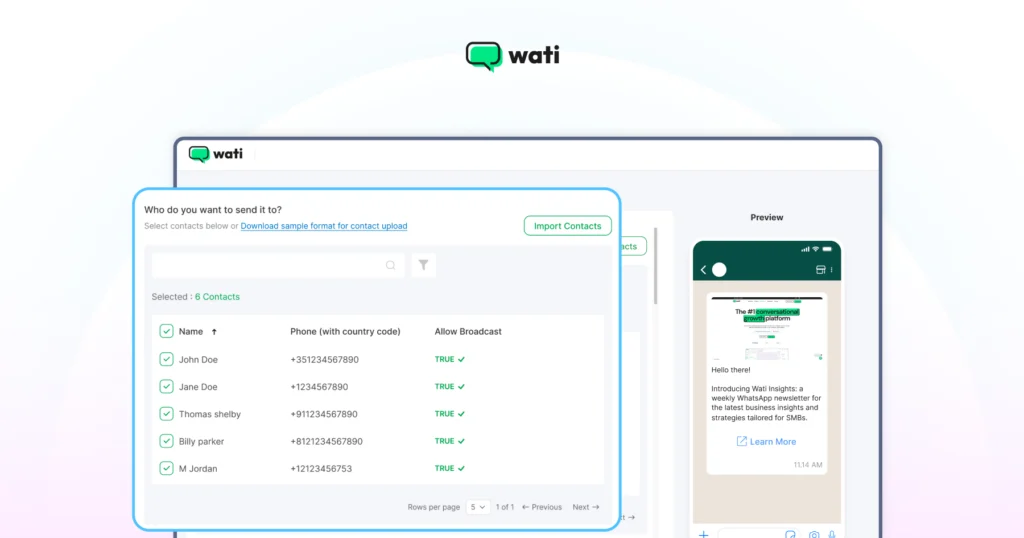
1. Create a Contact List
Start by importing your contacts into the Wati platform. For maximum impact, segment your contacts into relevant groups based on factors like their interests, location, or purchase history. This helps you send targeted messages and increase engagement.
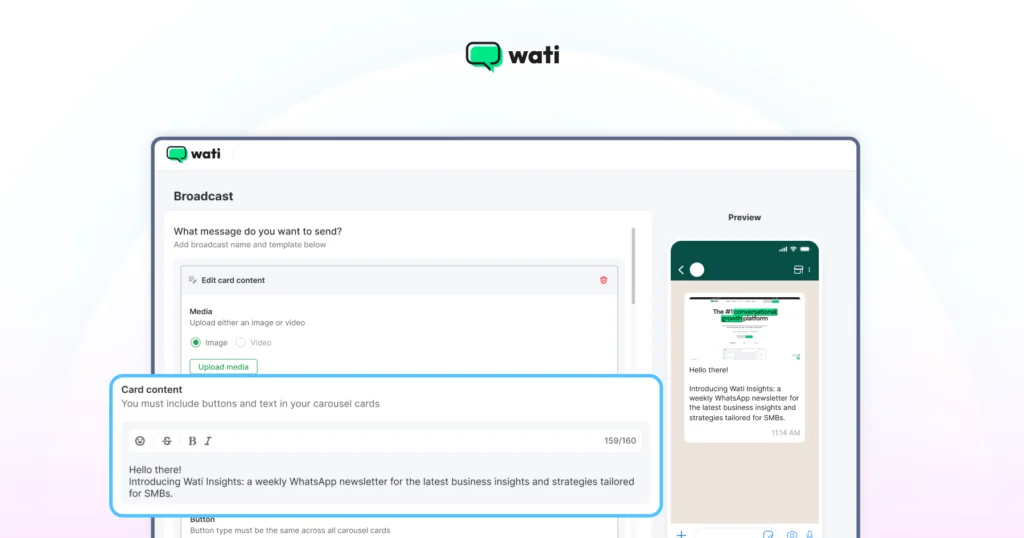
2. Craft Your Message or Choose a Template
Take the time to write a compelling message that resonates with your audience. Keep it concise, clear, and relevant. Alternatively, you can choose from Wati’s pre-designed message templates that align with your campaign’s goals and brand voice.
Special Resource: Improve Your WhatsApp Broadcast Score Instantly
3. Personalize Your Message
Customized messages can better attract audience attention and amplify overall brand experience. With Wati, you can use variables to include the recipient’s name, the current date, or a relevant location, making your message more engaging and tailored to each user.
4. Schedule and Send
Preset date and time for message triggers beforehand. Pre-planning and scheduling messages ensures maximum impact and makes an everlasting impact on the customer. With a simple click, you’ll reach out to the audience and engage when it matters most.
You can watch the video for step-by-step guidance on using our bulk WhatsApp sender feature.
5 Best Practices for Scheduling WhatsApp Messages in 2026
If you are requesting a particular action from the customer, you need to send the WhatsApp message carefully. Only timely messages can deliver results and conversions; the rest will be ignored or dumped away.
Here are the best practices you can follow if you are managing a WhatsApp scheduler for your business:
1. Respect Time Zones and Quiet Hours
A well-timed message is helpful, and an untimely message seems pushy. Always schedule messages according to your recipient’s local time zone and be mindful of cultural norms around business hours and weekends. Sending a promotional message at 3 AM is a surefire way to get blocked, which can damage your brand’s reputation.
Real-Life Example: A marketing agency in Mumbai wants to send a campaign update to a client in London. Instead of scheduling it for 11 AM IST (6:30 AM in London), they schedule it for 3 PM IST (10:30 AM in London), ensuring it arrives during the client’s working hours.
2. Prioritize Personalization and Value
Go beyond just using a name; reference past purchases, appointments, or interests. This turns a generic broadcast into a meaningful one-on-one conversation, dramatically increasing engagement and building customer loyalty.
Real-life example: An e-commerce store, instead of sending a generic “Sale is on!”, schedules this message: “Hi Priya! We saw you loved the blue running shoes. The new V2 model is now in stock in your size! Would you like to take a look before they’re gone?
3. Secure Explicit Opt-in
Make it a rule to prompt users for WhatsApp opt-ins, and take their consent. Scheduling broadcasts or chats without consent raises concerns and is detrimental to brand image. It isn’t just a policy to avoid getting your account flagged; it is a foundation of a trust-based relationship and ensures you’re only messaging a receptive audience.
Real-life example: During online checkout, a customer ticks a box that says, “Yes, send my order updates and exclusive offers to me on WhatsApp.” This provides clear, documented consent for future marketing messages.
4. Keep Your Messaging Clear and Concise
Your messages should be short, scannable, and get straight to the point. Use formatting like bold text for key details, bullet points for lists, and emojis (sparingly) to add personality. Avoid long paragraphs that require users to scroll extensively.
Real-life example: Instead of sending a long paragraph, a clinic sends this reminder: “Hi Sameer! Just a friendly reminder about your dental appointment with Dr. Sharma on Wednesday, Oct 15th, at 4 PM. Please reply YES to confirm.
5. Include a Clear Call to Action
Every scheduled message should guide the user on what to do next. Whether it’s “Click here to track your order,” “Reply YES to learn more,” or “Visit our website for 20% off,” a clear CTA turns a passive message into an interactive one. This drives the conversation forward and makes your campaign’s success measurable.
Real life example: A travel company schedules a flash sale alert: “Hi Arjun!, Fares to Goa are 30% off for the next 48 hours only. Don’t miss out! Book your dream trip now: [link].”
You can follow these guidelines and transform your scheduled messages from simple notifications into powerful tools for building customer relationships and driving business growth.
Need help figuring out compliance? Check out our guide on how to align with data policies and state guidelines for WhatsApp.
9 Tips & Best Practices for Scheduling WhatsApp Messages
Here are some practical tips and best practices to ensure you’re scheduling messages like the pro you are.
1. Plan Your Content Calendar
Start with a clear plan. What do you want to communicate, and when? Sketch out a content calendar. Highlight special days, promotional periods, or any dates specific to your business that warrant a shout-out. This approach ensures you’re not just sending messages, but sending valuable content that resonates with your customers’ needs and expectations.
2. Respect the Clock (And Time Zones)
Are your customers spread across different regions? Factor in those time zones. You want your message to ping when it’s relevant, not when your customer is fast asleep. Check and double-check the timing. Your attention to this detail won’t go unnoticed and shows you respect your customers’ time.
3. Craft Clear, Concise Messages
No one likes reading a text that feels like an endless scroll. Keep your messages short, sweet, and to the point. Before scheduling, ask yourself: Is this clear? Can I make it shorter? Your customers will appreciate your respect for their time, especially when your message is a breeze to read.
4. Personalization Is Key
Your customers are individuals, not just entries in your contact list. Use their names, reference past purchases, or mention their preferences. It might seem like a small touch, but this personalization makes your customers feel seen and valued. It transforms your message from a generic broadcast into a personal note.
5. Double-Check Your Links and Information
Are you including a link to a new product or your website? Maybe you’re sharing a phone number for bookings? Whatever it is, click those links and check those digits! A non-working link or incorrect number isn’t just inconvenient; it can erode your customers’ trust and professional image.
6. Use a Reliable Third-Party App
Since WhatsApp doesn’t directly offer a scheduling feature, you’ll need a dependable third-party app. Do your research, read reviews, and perhaps invest in a trusted service. The smoother the app works, the smoother your communication strategy will be.
7. Regular Reviews and Updates
Set aside some time each week or month to review your scheduled messages. Are there any new developments your customers need to know about? Any sudden changes in the market? Stay agile; keep your messages up-to-date and relevant.
8. Welcome Feedback
Encourage your customers to share their thoughts. Did they find a particular message helpful? Would they like more info on certain topics? This two-way communication makes your customers feel involved and can provide you with invaluable insights.
9. Avoid Spamming
Last but definitely not least, don’t overdo it. Too many messages can annoy your customers and lead them to mute your notifications or even block you. Maintain a balance between staying present and overstepping.
Also Read: Exploring WhatsApp Features: Tips for Business and Personal Use

Turn Scheduled Messages Into Smarter Sales
The power to schedule WhatsApp messages transforms your communication from reactive to proactive. Whether you’re using a third-party app for quick reminders or a robust WhatsApp Business API platform like Wati for large-scale campaigns, the goal is the same: to engage the right prospect at the perfect time.
This isn’t just about saving time. It’s about building a smarter, more consistent sales strategy. When you keep customers informed with timely, personalized messages, you build an image of a reliable and caring brand. This trust is the foundation for stronger relationships and, ultimately, more conversions.
If you’re ready to move beyond basic scheduling and unlock the full potential of conversational commerce, exploring a solution like Wati is your next logical step. Start scheduling today, and turn every conversation into an opportunity.
How To Schedule WhatsApp Messages: Frequently Asked Questions
Got more questions? We’ve tried answering them below!
Yes, on platforms like SKEDit and Blueticks, you can access your list of scheduled messages and edit the content or reschedule it before it is sent. For iPhone Shortcuts, you’ll need to edit the automation itself.
Ans: For the Android and iPhone methods, your phone needs to be on and connected to the internet at the scheduled time for the message to be sent. This is a major advantage of using the WhatsApp Business API, which sends messages from the cloud, regardless of your phone’s status.
The iPhone Shortcuts method is completely free. Most third-party apps like SKEDit have a free tier with limitations and a paid premium version with more features. Business solutions using the WhatsApp API have their own pricing structures.
For personal use, it’s highly unlikely. For businesses, as long as you have user consent (opt-in) and are following WhatsApp’s policies, scheduling messages is perfectly workable.